Plotting a bearing on a map using a baseplate compass adjusted for declination
Sighting the bearing
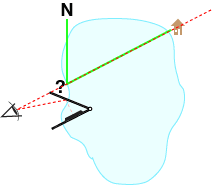
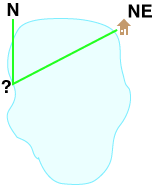
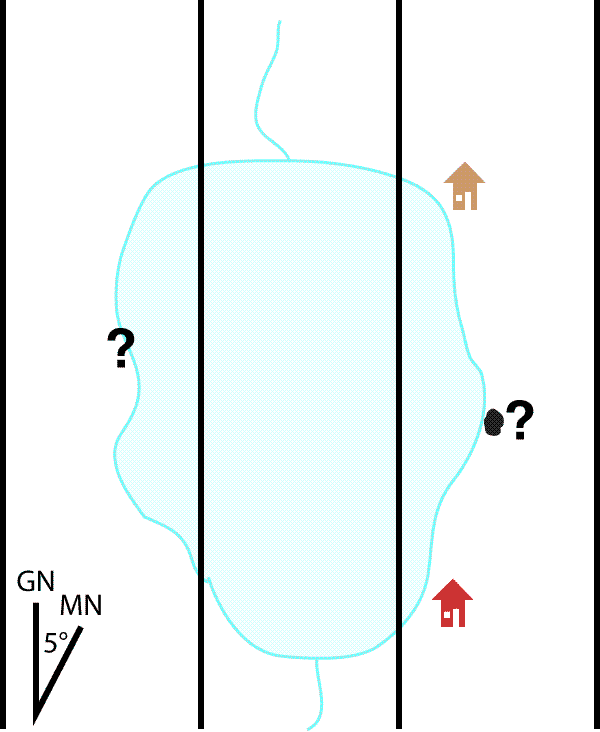
To determine our location we are going to combine two pieces of information on our map. We know that we are somewhere along the shoreline of the lake. Using a compass we can sight a bearing to our cabin across the lake. When we plot the bearing on our map, our location will be where the line between our location and the cabin crosses the shoreline of the lake.
Determine a rough direction to the target
Use a compass to get a general sense of direction for North, South, East, and West. Identify on of the eight compass points (N, NE, E, SE, S, SW, W, NW) that roughly describes the direction to our sighting target. In our example at the lake, our cabin is NE of our current location. Refer back to this "reality check" occasionally during plotting to make sure what you are doing makes sense.
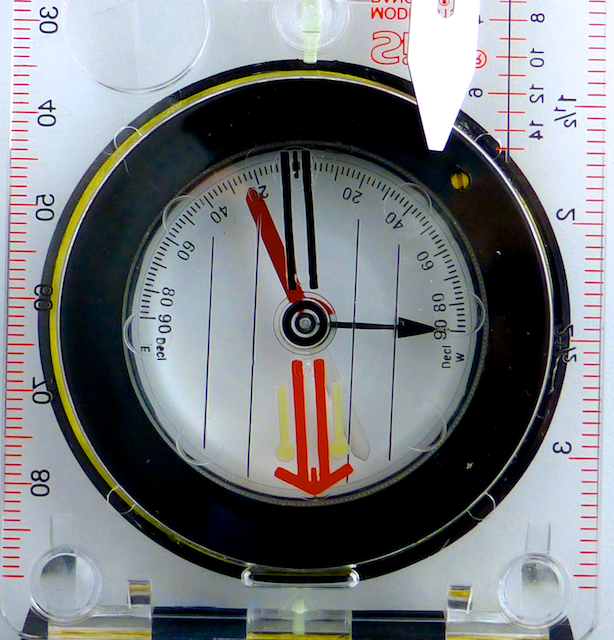
Check the declination adjustment on your compass
Our intent is to adjust for the difference between Magnetic North and Grid North on our compass, so that we do not have to make any further adjustments or calculations out in the field. Whenever you move to an area where the declination is different, you will need to readjust your compass. It's a good idea to occasionally check that your compass is adjusted correctly.
Gear driven declination adjustment
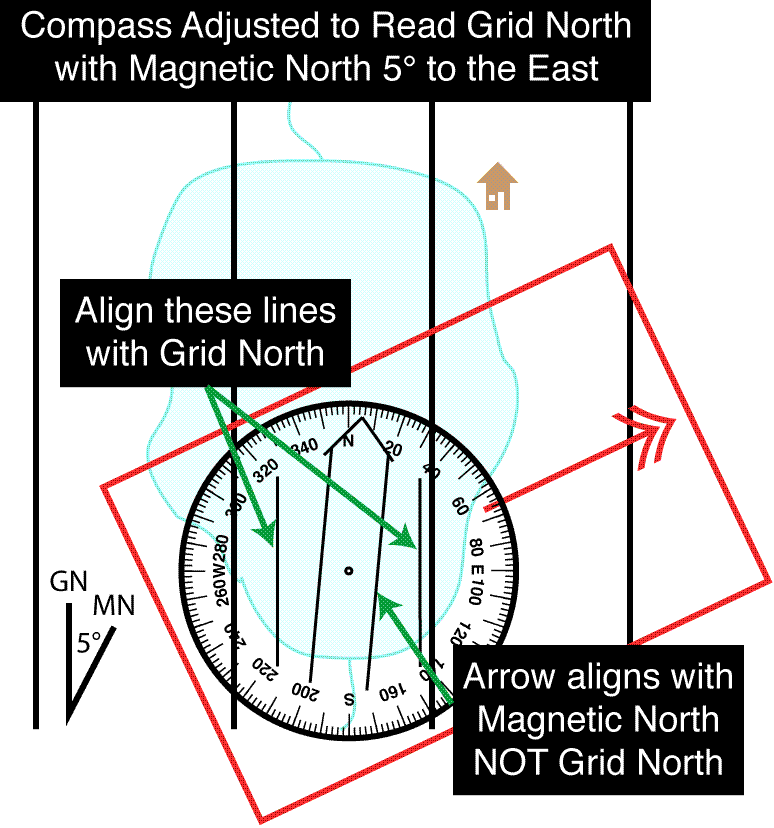
These compasses are typically adjusted using a small screw head on the bottom of the baseplate. The screw head drives a small gear which in turn rotates the Orienting Arrow inside the capsule. A small red index line has been moved 5° in the direction labeled "E. Dec." In the view from the top we see the Orienting Arrow is no longer parallel to the Meridian Lines. Instead it points 5° East of North.
On a compass where the Magnetic Needle Orienting Arrow can be moved independently of the rest of the compass capsule, an adjustment for 5° East will look like this:
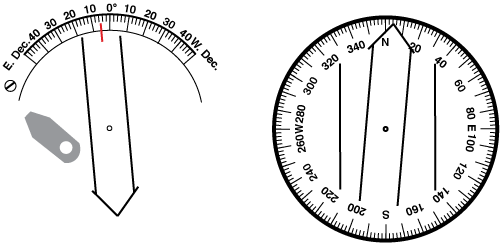
Friction fit declination adjustment
The Meridian Lines on these compasses are typically printed on the Angular Measurement Ring. Since the entire capsule rotates, this is the only way to keep the Orienting Arrow independent of the Meridian Lines. It is somewhat more difficult to align this style of Meridian Lines, with the north reference lines on your map.
On a compass where the compass capsule is moved relative to the angular measurement ring, an adjustment for 5° East will look like this:
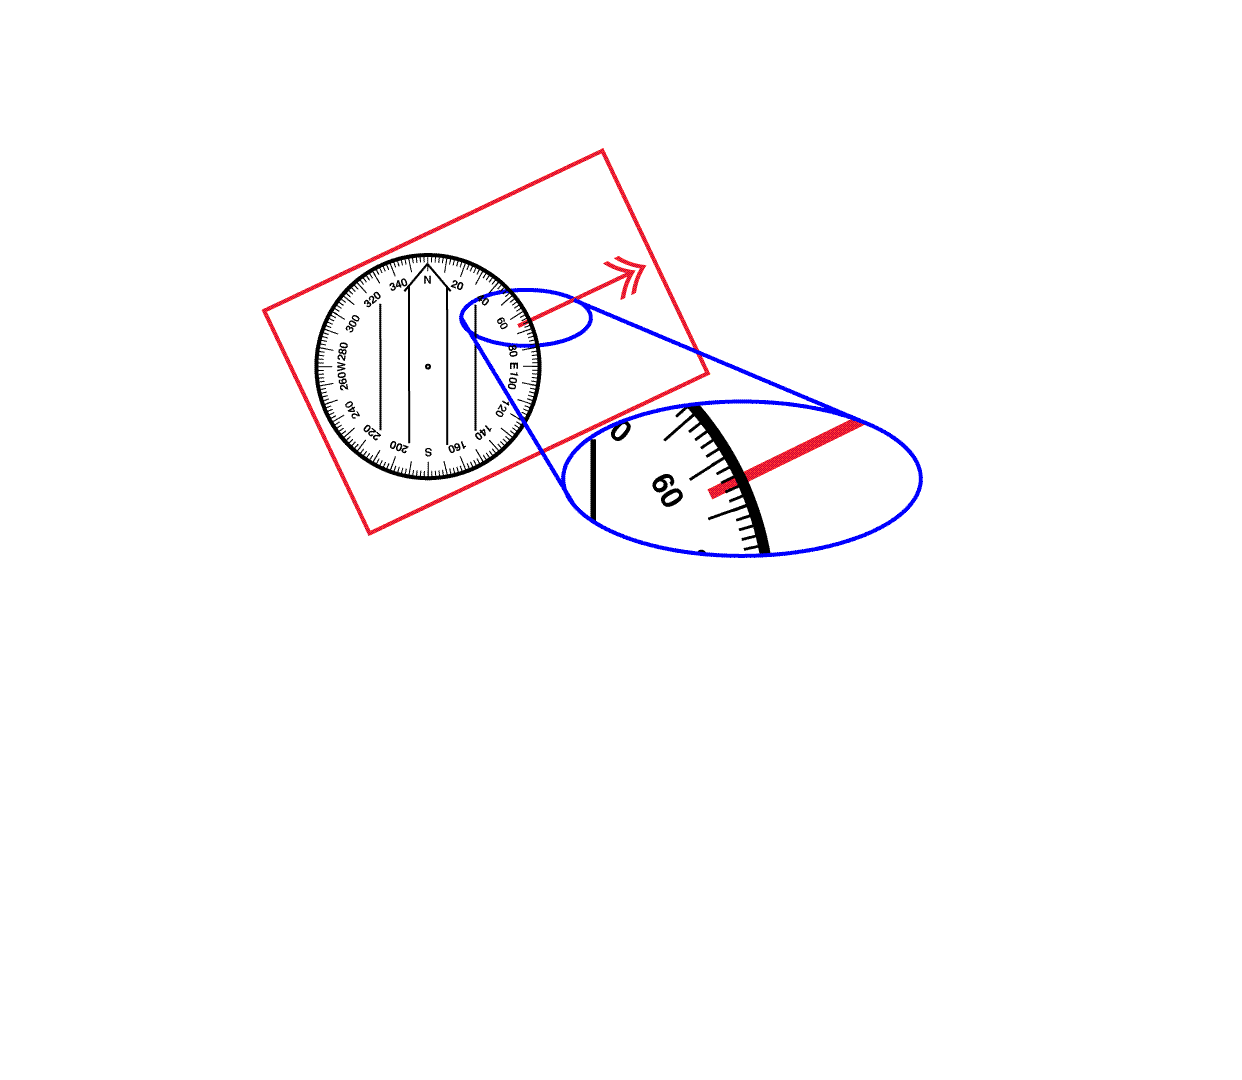
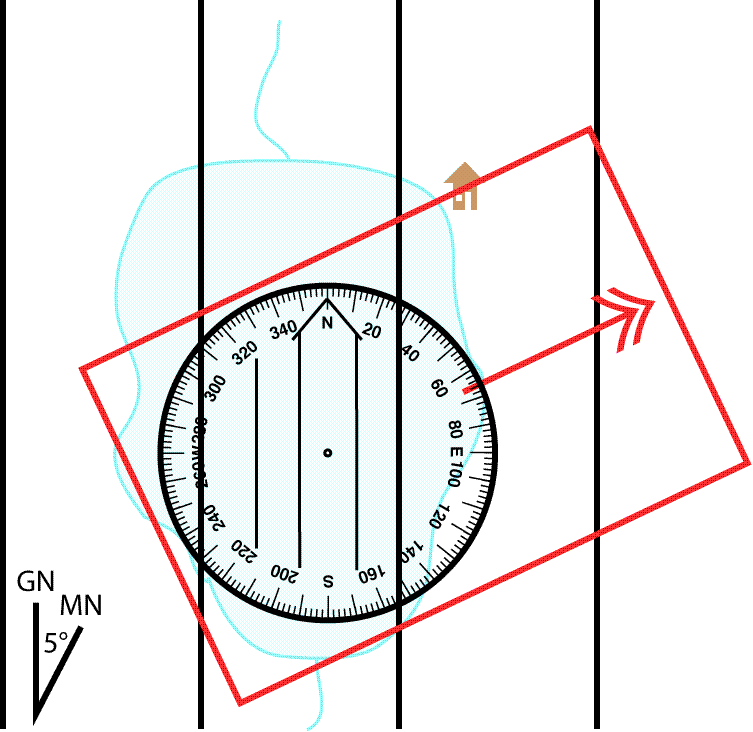
Sight the bearing to the target
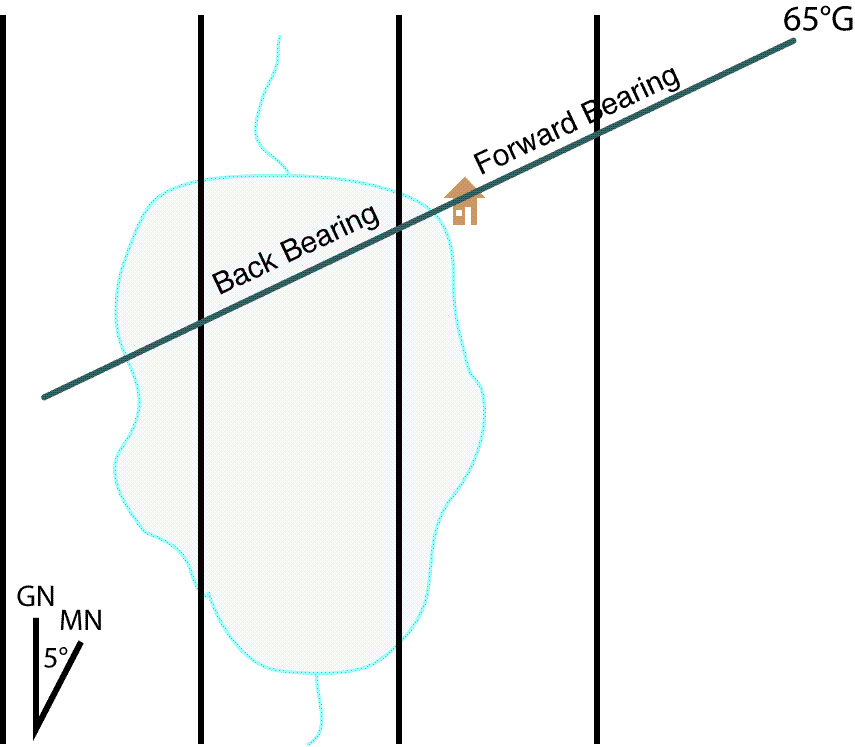
Using our compass we have sighted a bearing to our cabin of 65° from Grid North. The north reference is an integral part of any bearing. Make sure you include it when you say or write a bearing. We can abbreviate to either 65° Grid or just 65°G
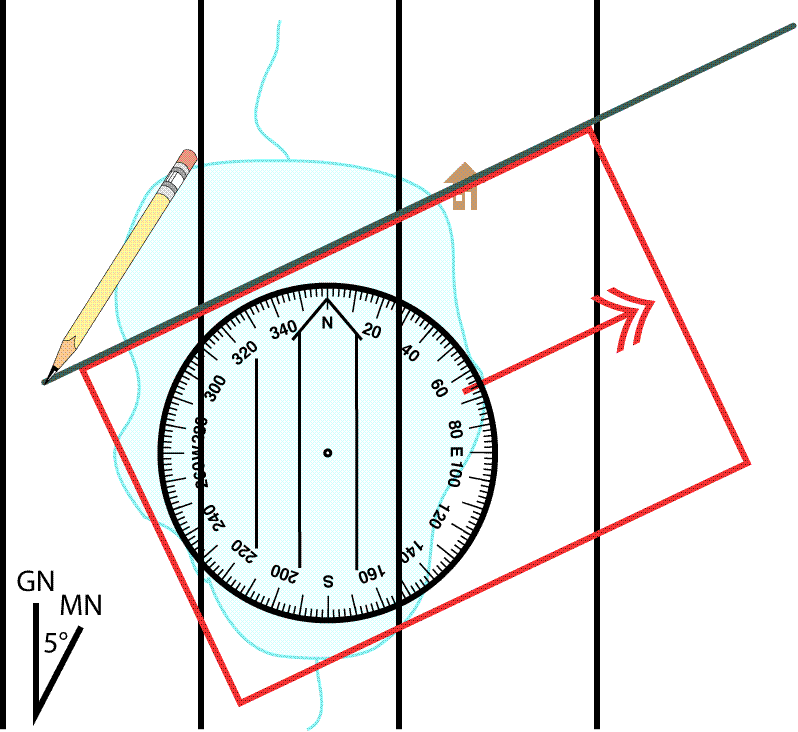
Adjust the north reference to match the map
We want to plot our bearing onto the map relative to Grid North. Since we adjusted our compass to read directly relative to Grid North, no adjustment needs to made to our bearing
If you don't already understand north references and converting between them, you should take a detour to our North Reference Tutorial.
Our bearing was taken from an unknown location, towards a known location. When we plot it on the map, we will start plotting at the known location, and extend the bearing line back towards the unknown location. This is known as a back bearing.
For more information on forward and back bearings, see our tutorial on forward and back bearings.
Step by step procedure for plotting with a baseplate compass adjusted for declination
Additional techniques for plotting a bearing...
- Plotting a bearing using a protractor
- Plotting a bearing using a baseplate compass
- Plotting a bearing using a straight edged lensatic compass
- Plotting a bearing using a round lensatic compass
Continue this tutorial on plotting a bearing with these links:
Plotting a second and third bearing to confirm your positionUsing bearings to locate a distant target