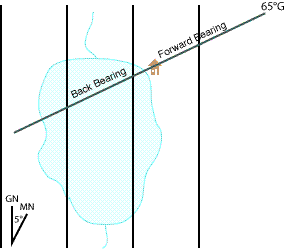
Plotting a Bearing on a Map
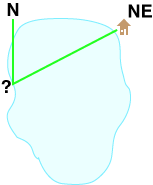
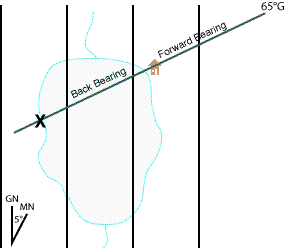
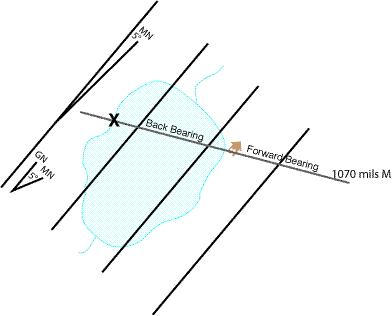
Plotting a bearing means drawing the bearing you measured in the field as a line on your map. A common use is locating yourself: you know you are somewhere along a feature (say, a lakeshore), you sight a bearing to a landmark you can identify on the map, and where the plotted line crosses the feature is your position. Because the bearing was taken from your unknown location toward a known landmark, you plot it starting at the known landmark and extend the line back toward yourself — a back bearing.
Every bearing carries a north reference (Magnetic, Grid, or True). It is an integral part of the bearing — always say or write it (e.g. "60°M" for 60° Magnetic). Most maps are gridded to Grid North, so unless your compass or method handles it for you, you must convert a Magnetic bearing to the map's north reference before plotting. If north references are unfamiliar, study North References (True, Magnetic, Grid) and Declination first.
A useful habit before plotting any bearing: identify roughly which of the eight compass points (N, NE, E, SE, S, SW, W, NW) the target lies in, and use that as a "reality check" as you work so an upside-down protractor or a sign error becomes obvious.
With a Protractor
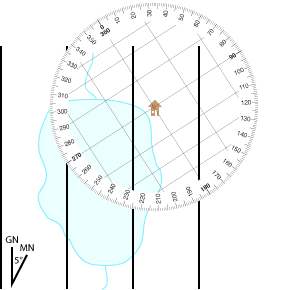
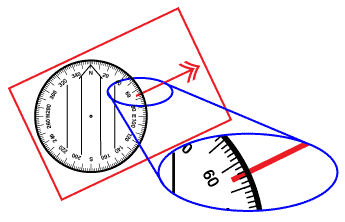
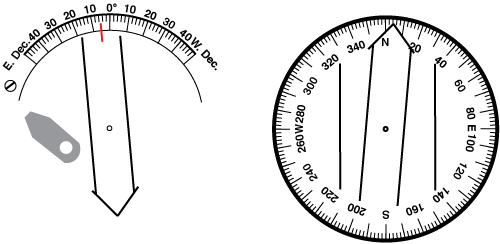
A good navigation protractor is marked in single degrees, numbered clockwise, with parallel lines running along the 0°–180° axis so you can align it to the map's north reference lines. (Avoid quadrant-style drafting protractors numbered 0–90 four times.) See Compass Uses for choosing and reading the instrument.
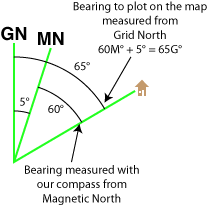
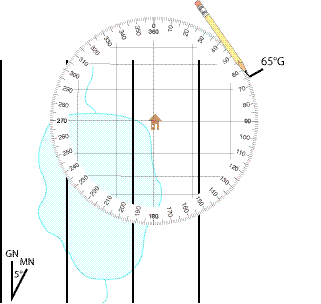
In the worked example, the sighted bearing is 60° Magnetic and the map shows Magnetic North 5° east of Grid North, so we add 5° to plot a 65° Grid bearing.
-
Convert the bearing to the map's north reference (here, 60°M + 5° = 65° Grid).
-
Place the center point of the protractor on the known point (the landmark).
-
Rotate the protractor until its 0°–180° lines are parallel to the north reference lines on the map.
-
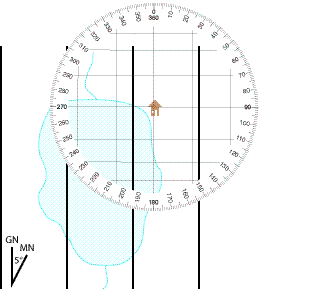
Make a small pencil mark at the edge of the protractor at the desired bearing value.
-
Remove the protractor and use a straight edge to draw a line from the known point through your mark, extending it as a back bearing toward your unknown location.

-
Where that line crosses the feature you are on (the shoreline) is your location.
Thread technique: many MapTools protractor tools have a hole at the center. Loop a piece of thread (or thin elastic) through the hole, pull it tight across the bearing value on the edge, and use the taut thread as your bearing line — handy for extending a line farther than a short straight edge reaches.
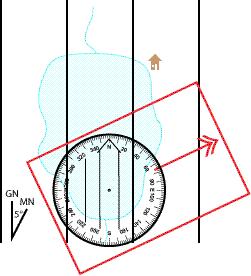
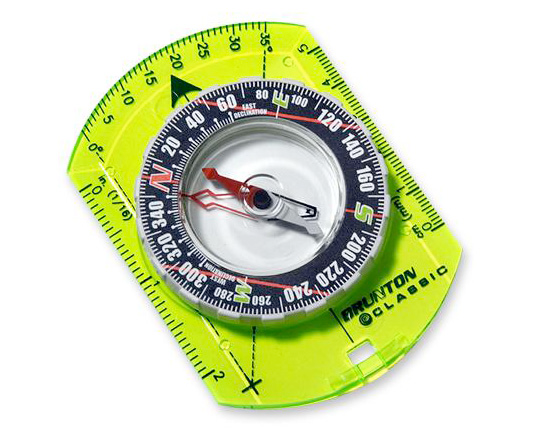
With a Baseplate Compass
You can plot with an orienteering/baseplate compass without orienting the map and without using the magnetic needle at all — the rotating capsule acts as your protractor. This example again adds 5° to a 60° Magnetic sighting to get 65° Grid.
-
Convert the bearing to the map's north reference and dial that value (65°) into the compass housing.
-
Set the compass on the map and rotate the whole compass until the capsule's meridian (orienting) lines are parallel to the map's north reference lines. The magnetic needle is ignored and may point anywhere; do not orient the map.
-
Keeping the capsule aligned to north, slide the compass so that one straight edge of the baseplate touches the known point.
-
Draw the bearing line along that baseplate edge, extending it as a back bearing.
-
Where the line crosses your feature is your location.
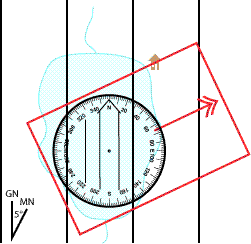
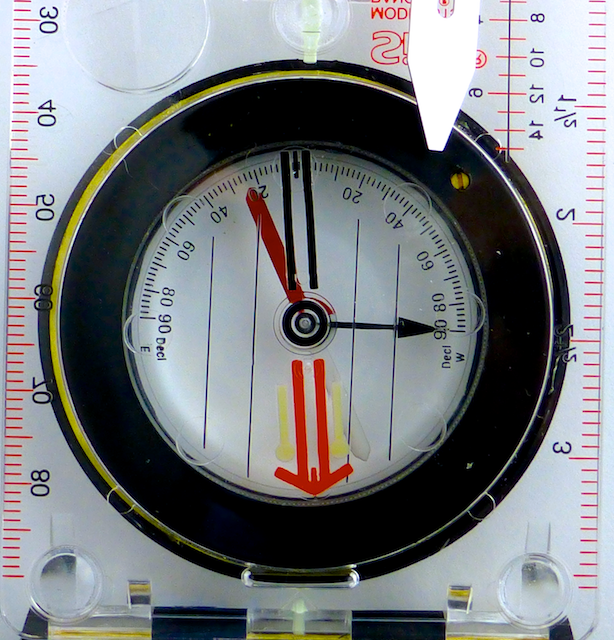
Adjusting for Declination
If your baseplate compass has a declination adjustment, you can set the Magnetic-to-Grid offset once and then plot directly in Grid degrees with no per-bearing math. Re-check the setting whenever you move to an area with different declination.
Two adjustment styles:
-
Gear-driven: a small screw on the bottom of the baseplate drives a gear that rotates the orienting arrow inside the capsule independently of the meridian lines. Adjusting 5° East moves the orienting arrow to point 5° east of north while the meridian lines stay put.
-
Friction-fit: the meridian lines are printed on the angular ring and the whole capsule turns, so the orienting arrow can't move on its own. This style is a bit harder to align to the map's north lines.
With the compass set for the local declination, the sighted bearing is read directly in the map's reference — here 65° Grid, no further conversion:
-
Confirm the compass is adjusted for the local declination (e.g. 5° East).
-
Dial the bearing (65°) into the housing. Because the compass is declination-set, no conversion is needed.
-
Set the compass on the map and rotate it until the capsule's meridian lines are parallel to the map's north reference lines. The magnetic needle is not used and the map need not be oriented.

-
Slide a straight baseplate edge to the known point.
-
Draw the bearing line along the edge and extend it as a back bearing to find your location.
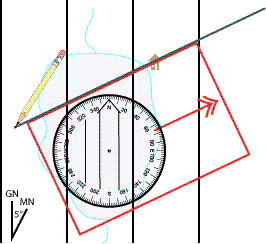
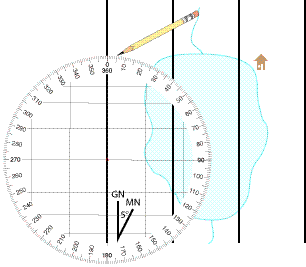
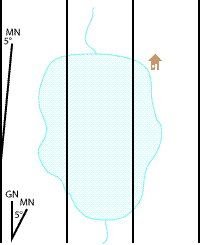
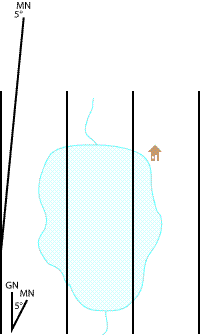
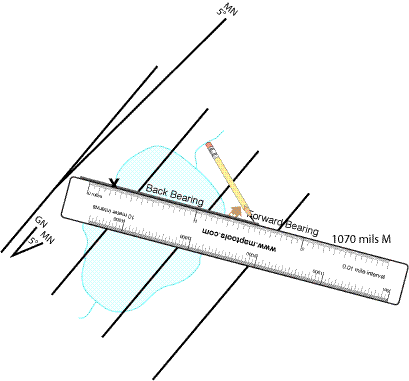
With a Lensatic Compass
Lensatic compasses use a floating magnetic dial rather than a settable capsule, so plotting with one requires orienting the map to Magnetic North and using the compass's own dial. Their cards are typically marked in 5° and 10-mil increments; 5° is too coarse for good work, so sight and plot in mils (the example uses 1070 mils Magnetic). Because you plot relative to Magnetic North, no north-reference conversion is needed — but you do need an accurate magnetic north line on the map.

Establish a Magnetic North reference line (do this once per map): do not trust the map's declination diagram — its angle is often drawn inaccurately and may be out of date. Instead, with a protractor aligned to True or Grid North (matching whatever reference your declination value is given in), mark the current declination angle and draw a labeled Magnetic North line with a straight edge. This line is good for many years.
Metal warning: you are using the live magnetic dial, so keep metal away. Watch the work surface — wooden tables often hide screws and nails — and never plot on a vehicle's hood or tailgate.
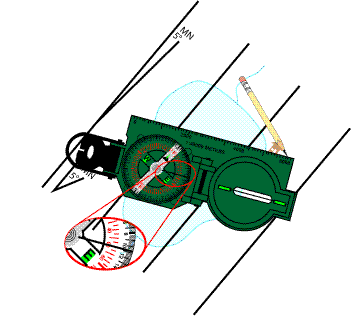
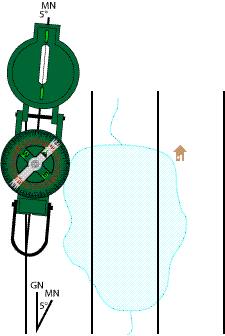
Straight-edged lensatic
-
Draw your Magnetic North reference line on the map (see above).
-
Lay the straight edge of the compass along the Magnetic North line.

-
Rotate the map and compass together as a unit until the magnetic dial reads north (the map is now oriented to Magnetic North).
-
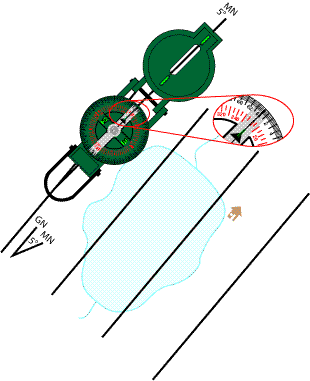
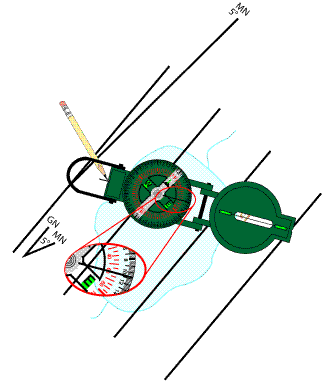
Without changing the map's orientation, slide the compass so its edge touches the known point and the dial reads your bearing (1070 mils).
-
Draw the bearing line along the edge and extend it as a back bearing. Where it crosses your feature is your location.
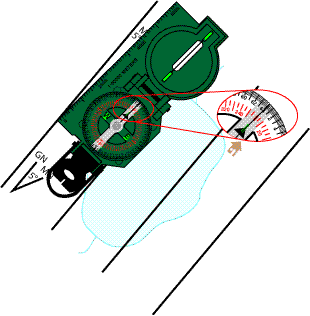
Round lensatic
A round lensatic compass has no straight edge. Use an imaginary line down its center — through the sighting wire and the dial's pivot. If the housing has alignment notches at each end of that line, use them; if not, add permanent notches (file, scratch, or marker) aligned with the sighting wire and pivot.
-
Draw your Magnetic North reference line on the map (see above).
-
Align the compass's center line (notches) along the Magnetic North line.
-
Rotate the map and compass together as a unit until the magnetic dial reads north.
-
Without changing the map's orientation, move the compass so the known point sits under the sighting wire and the dial reads your bearing (1070 mils).
-
Make a pencil mark at the far notch, then draw the bearing line through the known point and that mark with a straight edge, extending it as a back bearing.
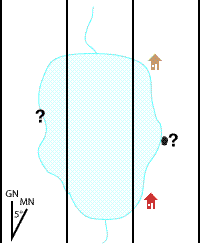
After plotting any bearing, plot at least one more bearing to a different known landmark — where the lines intersect confirms your position and exposes errors. The careful map-orientation and metal precautions are why many people prefer plotting with a protractor tool such as a coordinate scale and protractor instead.
More on maptools.com
Original step-by-step tutorials, with photos and diagrams, for each method:
- Protractor: https://maptools.com/tutorials/plotting/protractor
- Baseplate compass: https://maptools.com/tutorials/plotting/compass
- Baseplate compass, declination-adjusted: https://maptools.com/tutorials/plotting/compass-declination
- Straight-edged lensatic: https://maptools.com/tutorials/plotting/straight-lensatic
- Round lensatic: https://maptools.com/tutorials/round-lensatic